Fitting and Installation Instructions
Recommended Installers
Wallstgo.co.uk recommend using our trained professional installation partners to correctly install your wallpaper.
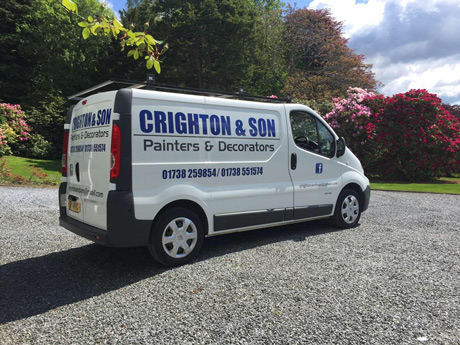
Working with Crighton and Son painters and decorators, from Perth, ensures a high level of workmanship is maintained from initial wall preparation to hanging, finishing and cleaning.
Crighton and Son Painters and Decorators have over 50 years experience in the industry and value for money,with first class attention, is guaranteed.
Installation costs start a £15 sqm.
We can arrange to have our decorators pay a site visit and confirm costs with you.

Contact Crighton and Son Painters and Decorators - 01738 259854 / 01738 551574
BEFORE YOU START
Make sure that your delivery is intact and has not been damaged in transit. For best results use the products and follow the instructions to the tee.
Make sure that you have adequate lighting - so that you can inspect the material properly while you are hanging it and after it is in position. The cool thing is that it is re-positionable - so if something has gone slightly awry - you can sort it there and then.
Make sure that the area you are hanging is at least 12°C (55°F) ... and as you are using an adhesive paste on the walls, make sure that there is good ventilation.
SURFACE PREPARATION
Brush off area to be covered with a stiff bristle brush to remove all dirt and loose material.
All surface marks should be removed using a detergent solution.
Allow to dry thoroughly before applying.
Anything really gross like mould or algae on the surface should be treated with disdain and a fungicidal wash following instructions on the product. Allow to dry thoroughly before applying.
Any holes, cracks or defects in the surface should be filled with a good quality filler, smoothed out and allowed to dry.
Just remember ... a dry surface is the right surface - so if you have to make repairs ... be patient! And let it dry.
SURFACE SCIENCE
Uncoated absorbent surfaces: Apply one coat of primer, diluted 1 part primer to 3 parts clean water. Allow to dry thoroughly.
Coated absorbent surfaces: Very Important! Multi-coats may impair the porosity of the surface and affect adhesion. If you are in any doubt whatsoever, or an oil-based paint has been used on the surface, please phone our technical advisors at the customer service office on: +44 8705 117 118.
But if you are confident to move on ... ensure all surfaces are dry in depth and apply one coat of primer - 1 part primer to 1 part clean water. Allow to dry thoroughly.
Now apply to the surface using Light adhesive making sure to treat one drop area at a time. Hang in the direction of the design overlap and trim subsequent drops as required.
Non-absorbent surfaces: Very important! If the surface is cement or concrete or is unstable in any way ... you should give our technical team a call on +44 8705 117 118 for a bit of advice (they are very friendly people). But basically, any filled, patched or absorbent areas should be made smooth and equalised in colour and absorbency with a similar pigmented oil-based paint.
Now apply to the surface using Sealed Surface Adhesive, pasting the adhesive onto the surface of the wall. Hang in the direction of the design and butt join or overlap and trim subsequent drops as required.
Sealed Surface Adhesive should be applied one drop at a time or it will end up getting messy. If you are hanging on uncoated plasterboard you must use Easystrip Adhesive.
HANGING SCIENCE
Wet the back of the material using clean water and a decorators sponge ensuring it is evenly wet. Fold top to bottom and allow to soak for 15 minutes before hanging.
Apply undiluted adhesive to the surface to be covered using a medium-pile paint roller. Only paste one drop area at a time.
Use a soft spatula to apply to the prepared surface using a smooth up-and-down motion. Take care not to squeeze the adhesive out at the edges.
Let settle for about 15 minutes before trimming the top and bottom.
When overlap and trimming, overlap sufficiently to match up the design and then trim down the middle ensuring that protective plastic strips are used to protect the wall. If you don’t want to join it up straight away, turn back the edges by about 5cm (2") until you are ready to make the join with the next drop.
STRIPPING AND REMOVAL
Paper can be removed dry without causing damage to the wall surface (assuming that the wall surface is stable or has been made stable prior to application). You may find, however, that the non-woven backing splits as you take down, and bits get left behind on the surface ... not a problem ... they can easily be removed by soaking them in warm water mixed with a mild household detergent and gently working the pesky puppies off the surface with a wallcovering stripping knife.
